How Do I Prep a Session in 30 Minutes?
Campaign building shouldn't take your entire day. A repeatable 30 minute session prep workflow built on dashboards, quest tracking, and last week's journal
By Jon ·
What you'll learn: How to build a repeatable 30-minute session prep workflow using Kanka's dashboard, journals, and quest tracking Kanka features used: Campaign dashboards, Session journals, Quest tracking, Fantasy calendars, @mention system Time to complete: 15 minutes to set up, then 30 minutes per session going forward
Campaign building doesn't stop after session one. Every week you sit down to prep, and every week the same thing happens: you re-read old notes trying to remember what Lord Harren promised the party, search three different docs for the name of the tavern in Ashwick, and manually check whether that side quest from session 4 ever got resolved.
The prep time isn't spent creating. It's spent searching.
This tutorial shows you how to set up a campaign dashboard that pre-assembles your session context, so your weekly prep starts with reviewing, not hunting.
If you're building your first campaign from scratch, our hub guide on worldbuilding for tabletop RPGs covers the foundational structure this workflow depends on.
Why Does Prep Take So Long?
Most session prep tools store your world passively, they don't surface what's relevant. Flat notes, scattered Google Docs, and generic DM tools treat every piece of information equally. Nothing tells you which NPCs are active, which plot threads your players tugged on last week, or which faction deadline is three in-game days away.
The result? You spend 2–4 hours doing administrative recovery before you get to the creative part.
Here's what's actually happening during that time:
| Where Prep Time Goes | What You're Doing | What a Relational System Does Instead |
|---|---|---|
| Re-reading session recaps | Searching for NPC names and plot threads | @mentions in journals auto-link every entry referenced in the recap |
| Checking quest status | Opening multiple docs, scanning for updates | Quest entries with Active/Completed/Failed status, filterable in one widget |
| Finding relevant locations | Browsing folders, guessing file names | Location entries cross-referenced to characters, quests, and events |
| Tracking time-sensitive events | Maintaining a separate calendar or spreadsheet | Calendar reminders surface upcoming events automatically |
If you become overwhelmed by the process of prepping, your tools are failing you, you’re not the one failing.
The fix isn't "prep less." It's a system where the relational web between your entries does the retrieval work for you. Every @mention you write, every quest element you link, every calendar reminder you set — that's the cross-referencing infrastructure that future prep sessions depend on.
How Do I Build a Prep Dashboard?
Configure four dashboard widgets once, then use them every prep session. Open your campaign dashboard settings and add a widget.
Widget 1 — Active Quests. Add an entry list widget filtered to your Status:Active tag. This shows every open quest. Your campaign's living table of contents — the backbone of a living world that updates as the story evolves.
Widget 2 — Seed entries. Add an entry list widget filtered to Status:Seed. These are the half-formed ideas from previous sessions, an NPC name you dropped, a rumor you improvised, a location the party asked about. Seeds are your creative backlog.
Widget 3 — Recent Sessions. Add a journal list widget showing the last 10 session journals. These are your prep starting point every single week.
Widget 4 — Campaign Calendar. Add a calendar widget showing the current in-game date with upcoming reminders. Faction deadlines, NPC birthdays, seasonal festivals, anything time-sensitive surfaces here without manual tracking.

Four widgets. Thirty minutes. Everything you need to prep the next session is already here.
This dashboard is the single entry point for every prep session. Configure it once. The widget filters handle the rest.
What's the Actual Workflow?
Five steps, same order, every week. The first three steps are review. Only Step 4 requires creative work.
Step 1: Review Last Session (5 min)
Open the most recent journal entry on your dashboard. Read through your @mentions, they're the threads your players pulled on. Note which characters, locations, or quests got the most attention.
The @mentions do double duty here. Every entry name you typed with @ in last session's recap is now a live link. Click through any that seem important. The entry relations panel shows you who's connected to what without re-reading five sessions of backstory.
Write prep notes as Articles on the relevant entries, not in a separate document. This keeps context co-located with the NPC or location it's about.
Step 2: Triage Seed entries (5 min)
Check your Seed entries widget. For each seed, decide: expand it, archive it, or leave it for later.
If players engaged with a seed last session, flesh it out. Add 2–3 properties and one relation to another entry. A seed NPC gets a goal and a connection to a faction. A seed location gets a parent location and one notable feature.
If nobody bit? Leave it. Seeds are cheap to create and free to ignore.
Step 3: Update Active Quests (5 min)
Open each active quest. Update the status if the story branched. Add new quest elements, maybe the party picked up an unexpected ally, or a new location became relevant.
Check quest prerequisites. If a quest depends on something the party hasn't done yet, note it. If a quest resolved last session, mark it Completed and move on.
Step 4: Prep the Next Scene (10 min)
Based on Steps 1–3, identify the most likely next encounter. Where are the players headed? Which NPC are they likely to talk to?
Write a brief Article on the relevant location or character entry: "What happens when the party arrives." Two to three sentences. A scene hook, not a full script.
Create any new seed entries for NPCs or locations that might appear. Use the Quick Creator (press 'N') to add them without leaving your current page. Tag them Status:Seed.
If this step takes more than 10 minutes, be wary of overprepping. The scene hook is enough, your players will take it somewhere you didn't plan anyway.
Try this now: Set up a free Kanka campaign and build your first prep dashboard. The four-widget layout takes about 15 minutes to configure.
Step 5: Calendar Check (5 min)
Advance the in-game date on your campaign calendar. Check what reminders fire this session. Note any time-sensitive plot threads: a faction ultimatum expiring, a festival starting, an NPC's deadline arriving.
Link your new session journal to the current calendar date. This transforms your session recaps into chronological, cross-referenced campaign history. Six months from now, you can check the calendar to see exactly what happened on any given in-game day. That's lore consistency enforced by the system, not your memory.
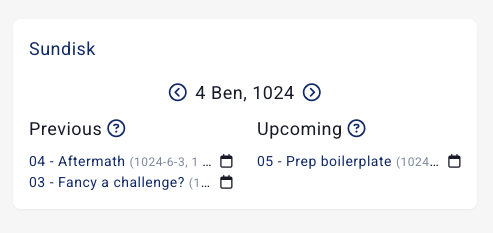
It should now look something like this.
How Does This Get Faster?
The workflow accelerates as your relational web grows. By session 10, Steps 1–3 take 5 minutes total because the system surfaces everything: active quests are already filtered, seed entries are already tagged, and your journal @mentions already link to every relevant entry.
The 30 minutes is the ceiling, not the floor. A campaign with 50+ cross-referenced entries and consistent tagging makes the dashboard do most of the cognitive work.
Run this workflow the same day each week to build the habit. Sunday afternoon works for most groups. The consistency matters more than the specific day.
One more thing: the same campaign wiki that powers your prep can also serve your players between sessions — if you design the player-facing experience deliberately. That's a different workflow, and we cover it in our guide on building a campaign wiki players will actually use.
Start your free campaign → Unlimited entries, unlimited campaigns, no paywalls.
If you have any questions, join us over on our Discord!
Related Articles
Stop building worlds you'll never use. Start with one town, expand from play, and let a relational system keep it all connected. Free, no entry limits.
Organize fantasy locations from continent to single room. A D&D world building hierarchy that stays searchable as your campaign grows past 200 entries
Stop losing NPCs in scattered notes. Link every character to their location, faction, and quest so context surfaces the moment a player asks. Free, any system